If you’ve ever wondered when and how to add that glorious butter to your chocolate cookie dough, you’re in the right place.
In this blog post, we’ll guide you through the step-by-step process, from softening the butter to shaping and baking your heavenly chocolate cookies. Get ready to embark on a mouthwatering journey into the art of cookie making!
Understanding When to add butter to chocolate cookie dough and why.
Typically, you’ll want to incorporate softened butter into your cookie dough during the creaming step, which is one of the initial stages of mixing the ingredients.
Here’s a step-by-step guide to help you understand when and how to add butter to your chocolate cookie dough:
Gather Ingredients: Before you start, make sure you have all your ingredients ready, including butter, sugar, flour, eggs, cocoa powder, baking soda, and any additional flavorings or mix-ins.
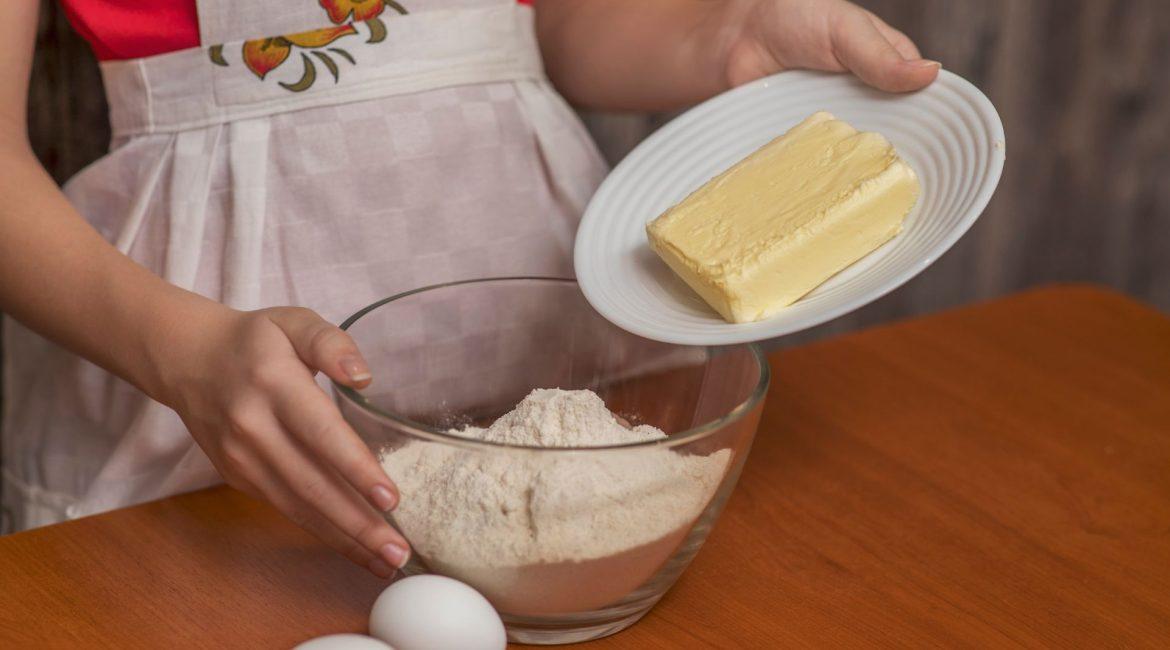
Soften the Butter: To achieve the right texture for creaming, the butter should be softened but not melted.
You can achieve this by leaving it at room temperature for about 30-60 minutes or using a microwave on low power in short intervals.
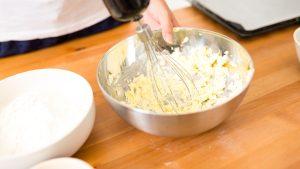
Cream the Butter and Sugar: Place the softened butter and the sugar (usually granulated sugar) in a mixing bowl.
Use an electric mixer or a wooden spoon to beat them together until the mixture becomes light and fluffy.
This step is essential for incorporating air into the dough, which helps create a tender and soft cookie texture. This process typically takes 2-3 minutes.
Add Other Wet Ingredients: Once the butter and sugar are creamed, you can add other wet ingredients like eggs and vanilla extract.
Mix them until well combined with the butter and sugar mixture.
Sift Dry Ingredients: In a separate bowl, sift together your dry ingredients, such as all-purpose flour, cocoa powder, baking soda, and salt.
This helps ensure even distribution and prevents lumps in your dough.
Combine Wet and Dry Ingredients: Gradually add the sifted dry ingredients to the wet ingredients (butter, sugar, eggs, and vanilla).
Mix until just combined. Be careful not to overmix, as this can result in tough cookies.
Fold in Chocolate Chips or Chunks: If your recipe includes chocolate chips or chunks, gently fold them into the dough until they are evenly distributed.
Chill the Dough (Optional): Depending on your recipe, you may need to chill the dough in the refrigerator for a specified time.
Chilling can help prevent cookies from spreading too much during baking and can enhance their flavor.
Shape and Bake: Once your cookie dough is ready, you can shape it into cookies and place them on a baking sheet lined with parchment paper. Follow the baking instructions in your recipe regarding temperature and time.
Adding butter at the right stage of the mixing process is crucial for achieving the desired texture and flavor in your chocolate cookies.
Creaming the butter with sugar creates a creamy, airy base that contributes to the cookie’s tenderness and helps incorporate air for a lighter texture.
Leg delves into Further Explanations: Let me explain these points mentioned further.
First, let’s explain the importance and process of gathering ingredients and softening butter for making chocolate cookies:
1. Gather Ingredients.
This initial step is like laying the foundation for your cookie baking project.
Having all your ingredients ready before you start ensures a smooth and organized baking process.

It prevents last-minute rushing around the kitchen to find missing ingredients and helps you follow the recipe accurately.
In the case of chocolate cookies, common ingredients include butter, sugar, flour, eggs, cocoa powder, baking soda, and any additional flavorings or mix-ins, such as chocolate chips or nuts.
let’s break down the process of softening butter for your chocolate cookie dough in more detail:
2. Softening butter.
Why Soften Butter:
Softening butter is a crucial step in many baking recipes, including chocolate cookies.

Softened butter is easier to work with and combines more evenly with other ingredients.
It also traps air when creamed with sugar, which helps create a lighter and more tender texture in your cookies.
Room Temperature Softening:
The most common method for softening butter is to leave it at room temperature.
Place the butter on your kitchen counter in a butter dish or on a plate.
The time needed for softening at room temperature can vary depending on the ambient temperature. On average, it takes about 30 to 60 minutes.
You want the butter to be soft enough that when you press it with your finger, it yields slightly without being melted or too greasy.
Microwave Softening:
If you’re in a hurry or forgot to take the butter out in advance, you can use a microwave to soften it.
Caution:
Be very careful when using a microwave, as it’s easy to accidentally melt the butter, which is not what you want for most cookie recipes.
Place the butter in a microwave-safe dish.
Use the microwave’s lowest power setting (usually 10% power) or the defrost setting.
Heat the butter in short intervals, such as 5-10 seconds at a time, checking its consistency after each interval.
Stop microwaving as soon as the edges of the butter start to soften but the center is still slightly firm.
Continue to let it sit for a minute or two to allow the residual heat to soften the center.
Testing for Softness:
You can check the butter’s softness by gently pressing it with your finger. It should give slightly without feeling melted or overly greasy.
If it feels too soft or begins to melt, it’s better to let it firm up a bit at room temperature or in the refrigerator before using it in your cookie dough.
Note on Butter Temperature:
Different recipes may call for slightly different butter temperatures. For cookies, softened butter is usually ideal because it creams well with sugar to create the desired texture. However, some recipes may specifically call for melted butter for a different texture or flavor.
In other words, softening butter is a critical step in baking, and the method you choose depends on your time constraints and the specific recipe requirements.
Softened butter is essential for achieving the right texture and flavor in your chocolate cookies, as it ensures even mixing with other ingredients like sugar and contributes to the cookie’s overall quality.
let’s delve into the process of creaming butter and sugar together for your chocolate cookie dough, as well as adding other wet ingredients:
3. Creaming the Butter and Sugar.
After you have softened the butter to the correct consistency, it’s time to cream it with sugar.
You’ll need a mixing bowl, and you typically use granulated sugar for this step.
Measure out the appropriate amount of softened butter and add it to the mixing bowl.
Add the granulated sugar as well. The sugar acts as both a sweetener and an abrasive agent during the creaming process.
You have two main options for mixing:
Electric Mixer:
Use an electric mixer (handheld or stand mixer) with the paddle attachment. Start mixing on low speed to prevent the sugar from flying out of the bowl, then gradually increase the speed to medium-high.
Wooden Spoon:
If you don’t have an electric mixer, you can use a sturdy wooden spoon or a spatula. This method requires some elbow grease.
Creaming involves beating the butter and sugar together until the mixture becomes pale in color and noticeably lighter in texture. It should look fluffy.
This process typically takes 2-3 minutes with an electric mixer and a bit longer (around 5-7 minutes) by hand.
It’s crucial to be patient during this step because it’s what incorporates air into the dough, resulting in a tender and soft cookie texture.
4. Adding Other Wet Ingredients.
Once the butter and sugar are properly creamed, it’s time to add other wet ingredients, such as eggs and vanilla extract.
Crack the eggs into a separate bowl to check for any shell fragments and to ensure you don’t accidentally add a bad egg to your dough.
Add the eggs one at a time to the creamed butter and sugar mixture. Mixing in one egg at a time allows for even incorporation.
After each egg, add the vanilla extract (or any other flavorings specified in your recipe) and mix until everything is well combined.
Mixing at a lower speed or by hand during this step helps prevent overmixing, which can result in tougher cookies. Mix only until the ingredients are fully integrated.
Creaming the butter and sugar is a fundamental step in cookie baking, as it sets the foundation for the texture and flavor of your cookies.
The incorporation of air during creaming makes the cookies tender, while adding the eggs and flavorings adds richness and taste. These are essential steps in creating delicious chocolate cookies.
Let’s continue with the steps of sifting dry ingredients and combining them with the wet ingredients for your chocolate cookie dough:
5. Sift Dry Ingredients
Sifting dry ingredients is an important step in baking, as it serves multiple purposes:
It helps break up any lumps or clumps in the dry ingredients, ensuring they are evenly distributed in the cookie dough.
It aerates the dry ingredients, which can result in lighter and fluffier cookies.
It helps combine ingredients like cocoa powder, baking soda, and salt uniformly.
To sift your dry ingredients, you’ll need a separate bowl and a fine-mesh sieve or a flour sifter.
Measure out the specified amounts of all-purpose flour, cocoa powder, baking soda, and salt into the sieve or sifter.
Gently tap or shake the sieve or sifter over the bowl to sift the dry ingredients. This will create a fine, even powder that is free from lumps.
If your recipe includes other dry ingredients like spices or flavorings, you can sift them in at this stage as well.
Once sifted, set the bowl of dry ingredients aside.
6. Combine Wet and Dry Ingredients
Now that you have your creamed wet ingredients (butter, sugar, eggs, and vanilla) and your sifted dry ingredients, it’s time to bring them together to form the cookie dough.
Gradually add the sifted dry ingredients to the bowl containing the wet ingredients. It’s important to do this gradually rather than all at once. You can add it in portions, mixing between additions.
Use a spatula, wooden spoon, or your mixer on low speed to combine the wet and dry ingredients. Mix just until they are incorporated. Be careful not to overmix.
Overmixing can lead to the development of too much gluten, resulting in tough cookies. The goal is to mix until you no longer see streaks of dry ingredients in the dough, but do not continue beyond this point.
Combining the wet and dry ingredients properly ensures that the cookie dough is homogenous and ready for any additional mix-ins, such as chocolate chips or nuts. This step plays a crucial role in determining the texture and consistency of your chocolate cookies.
let’s proceed with the final steps of folding in chocolate chips or chunks and, if necessary, chilling the cookie dough:
7. Fold in Chocolate Chips or Chunks:
If your chocolate cookie recipe includes chocolate chips or chunks (which add delicious pockets of chocolate to your cookies), it’s time to incorporate them into the dough.
Gently add the specified amount of chocolate chips or chunks to the cookie dough. Use a spatula or a wooden spoon to fold them in.
Folding means gently incorporating the chocolate into the dough without overmixing. This helps ensure an even distribution of chocolate throughout the dough.
Continue folding until the chocolate chips or chunks are evenly dispersed, and you can no longer see large clumps of them in the dough.
8. Chill the Dough (Optional).
Depending on your recipe and personal preference, you may be advised to chill the cookie dough in the refrigerator for a specific period.
Chilling the dough is an optional but beneficial step for several reasons:
It helps the dough firm up, making it easier to handle and shape into cookies.
Chilled dough spreads less during baking, resulting in thicker and chewier cookies.
It allows the flavors in the dough to meld together, potentially enhancing the overall taste.
If your recipe calls for chilling, cover the dough with plastic wrap or place it in an airtight container.
Follow the recommended chilling time provided in your recipe. This can range from 30 minutes to several hours or even overnight.
After the chilling period, the dough is ready to be shaped into cookies and baked according to your recipe instructions.
The optional step of chilling the dough can have a significant impact on the texture and flavor of your chocolate cookies, so it’s worth considering whether to include it, especially if you prefer thicker, chewier cookies.
let’s conclude the process by shaping and baking your chocolate cookies:
9. Shape and Bake.
After completing all the previous steps and, if applicable, chilling the cookie dough, it’s time to shape the dough into cookies and bake them.
Preheat your oven to the temperature specified in your recipe. Typically, this is around 350°F (175°C) for many cookie recipes, but it can vary depending on the recipe.
Line a baking sheet with parchment paper or a silicone baking mat. This prevents the cookies from sticking to the pan and makes cleanup easier.
Using a spoon, cookie scoop, or your hands, portion out the cookie dough into evenly sized portions. The size will depend on your preference, but a common size is about 2 tablespoons of dough for each cookie.
Space the cookie dough portions evenly on the prepared baking sheet, leaving some room between them to allow for spreading during baking. Cookies should be at least 2 inches apart.
If you’d like, you can gently flatten each cookie with the back of a spoon or your fingers to your desired thickness. Keep in mind that thicker cookies will be chewier, while thinner cookies will be crispier.
Place the baking sheet in the preheated oven and follow the baking instructions in your recipe regarding temperature and time. The baking time typically ranges from 8 to 12 minutes, but it can vary depending on your oven and the size of your cookies.
Keep a close eye on the cookies as they bake, and look for visual cues such as the edges turning golden brown and the tops setting. Cookies continue to cook slightly after you remove them from the oven due to residual heat, so avoid overbaking them.
Once baked to your desired level of doneness, carefully remove the cookies from the oven and allow them to cool on the baking sheet for a few minutes.
After a brief cooling period, transfer the cookies to a wire rack to cool completely. This allows them to firm up and develop their final texture.
Enjoy your freshly baked chocolate cookies! The process of shaping and baking is the culmination of your efforts, resulting in delicious homemade treats.
A tabular on this topic here.
Here I provide you with a tabular representation of when to add butter to your chocolate cookies dough:
| Step | Description |
|---|---|
| 1. Gather Ingredients | Collect all necessary ingredients, including butter, sugar, flour, eggs, cocoa powder, etc. |
| 2. Soften the Butter | Achieve the right texture for butter by either leaving it at room temperature for 30-60 minutes or using a microwave on low power in short intervals. |
| 3. Cream the Butter and Sugar | Mix softened butter and sugar until the mixture becomes light and fluffy, typically taking 2-3 minutes. |
| 4. Add Other Wet Ingredients | Incorporate other wet ingredients like eggs and vanilla extract into the creamed butter and sugar mixture. |
| 5. Sift Dry Ingredients | In a separate bowl, sift together dry ingredients (flour, cocoa powder, baking soda, salt) to ensure even distribution and prevent lumps. |
| 6. Combine Wet and Dry Ingredients | Gradually add the sifted dry ingredients to the wet mixture and mix until just combined; avoid overmixing. |
| 7. Fold in Chocolate Chips or Chunks | Gently fold in chocolate chips or chunks into the dough until they are evenly distributed. |
| 8. Chill the Dough (Optional) | Depending on your recipe, you may chill the dough in the refrigerator for a specified time to enhance flavor and texture. |
| 9. Shape and Bake | Shape the dough into cookies, place them on a lined baking sheet, and bake according to your recipe’s instructions. |
This tabular representation provides a clear, step-by-step guide on when to add butter to your chocolate cookies dough and the subsequent steps in the cookie-making process.
Conclusion.
In conclusion, adding butter to your chocolate cookie dough is a pivotal step in creating delicious cookies.
Softening the butter, creaming it with sugar, and following the subsequent steps in the recipe ensure that your cookies have the desired texture and flavor.
From sifting dry ingredients to folding in chocolate chips and finally shaping and baking, each step plays a crucial role in achieving the perfect chocolate cookies.

Whether you’re a passionate baker or simply seeking sweet inspiration, I’m here to provide you with valuable insights, mouthwatering recipes, expert tips, and more to make your cookie adventures with Mike truly delightful and scrumptious. You are on the true exciting cookie-filled side.


